

3DS Max Spinner Snaps Tutorial
3DS Max features an array of snapping tools to make any workflow easier. The Spinner Snaps tool allows you to control the increments by which object parameters are increased or decreased. I used 3DS Max for years before I discovered this feature but now I use it all the time.
Introduction
The Spinner Snapping feature in 3DS Max is a serious time saver. It allows users to set fixed increment values by which many numbers of settings can be changed. It’s not that it saves tons of time necessarily as much as it saves a lot of frustration. It’s a must-have in my 3D Modeling workflow and I wanted to take a quick second to show how easily it can be set up.
For example, having the Spinner Snapping increment set to .125 would allow one to increase the height, width, or depth of an object by .125 units for each click of the Spinner related to that setting.
What the $@%& Are Spinners?
Spinners are available through 3DS Max as convenient ways to adjust values for many number of things. You’ll find them in render settings, object settings, modifier settings, and even places like preference menus. They are the defacto interface to adjust a value in 3DS Max. Just to make sure we’re all on the same page, this is what a “spinner” looks like in 3DS Max:
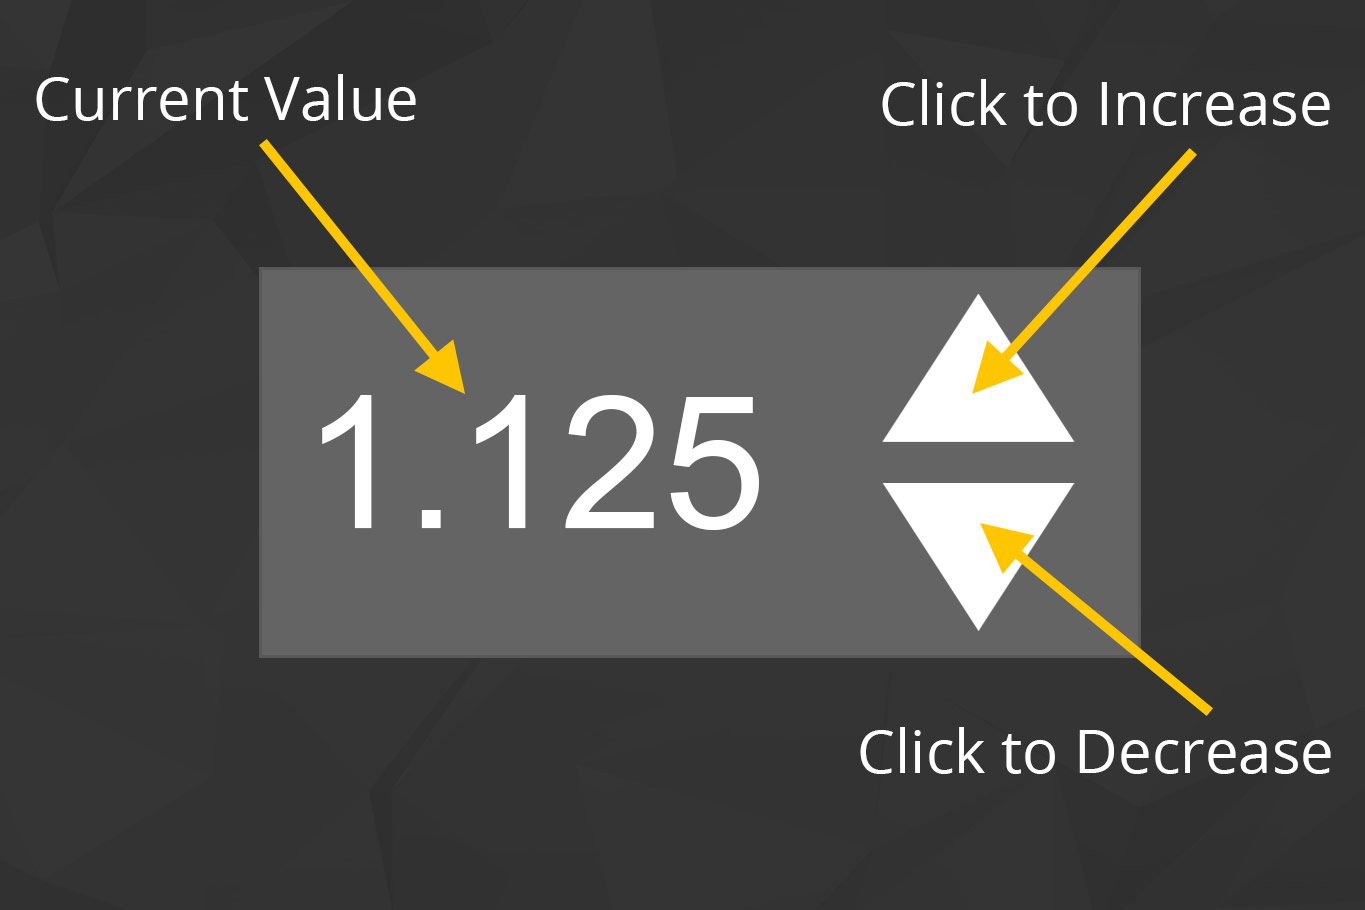
Why Use Spinner Snapping
Spinner Snapping lets you control the amount that a current value changes each time you click the up or down arrows. For example, I worked many years in an office that used 1/8th inch tolerances for everything (Wood working). By using spinner snapping and setting a custom increment amount, I was able to make my life much easier.
How to Set Up Spinner Snapping
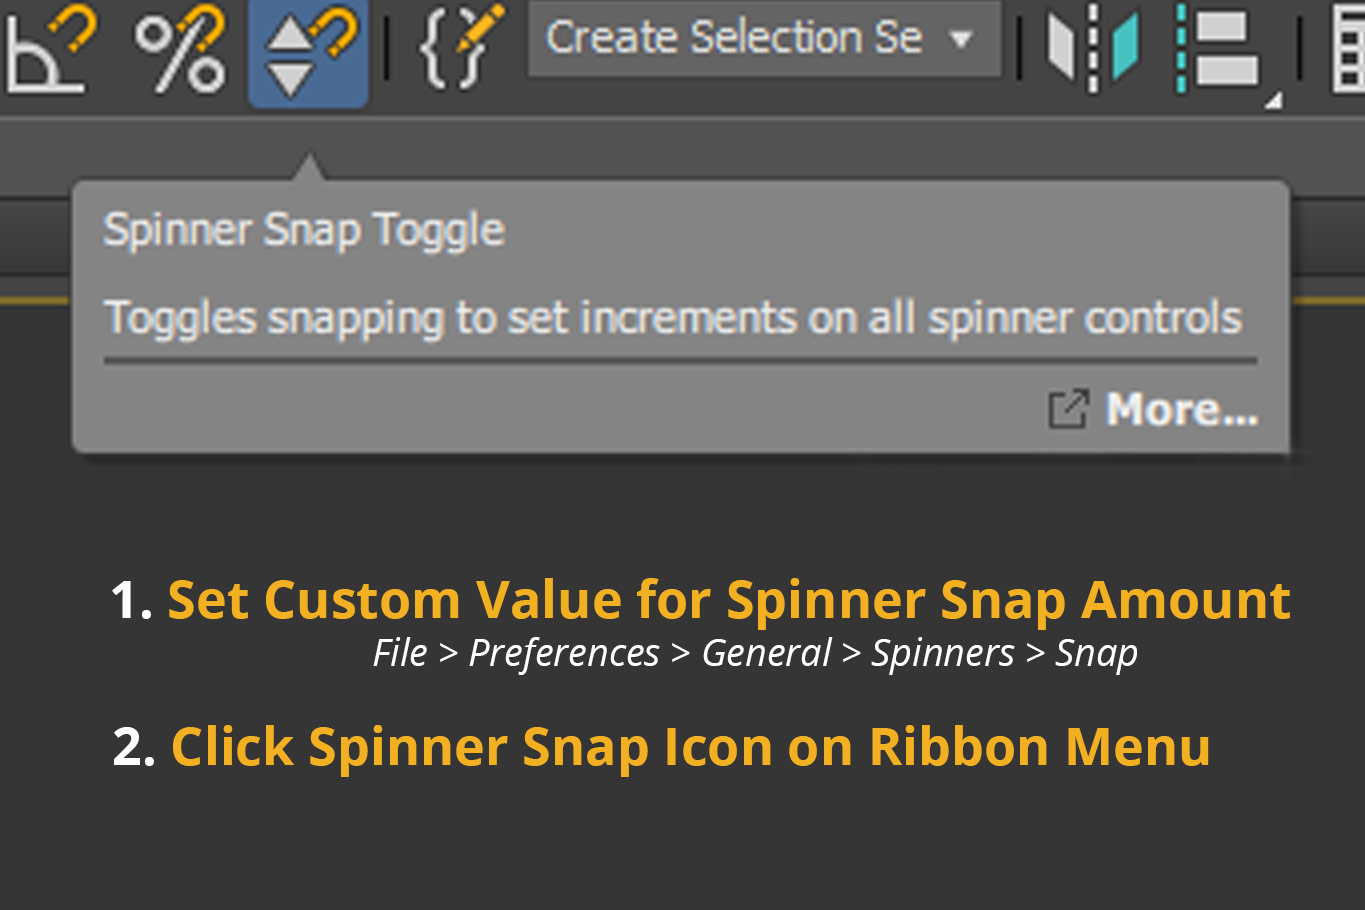
You need to complete two steps in order to properly set up spinner snapping. After that, of course, you’ll want to save your new preferences if you want your new values to persist between 3DS Max sessions.
Step 1: Set a custom value for Spinner Snap Amount
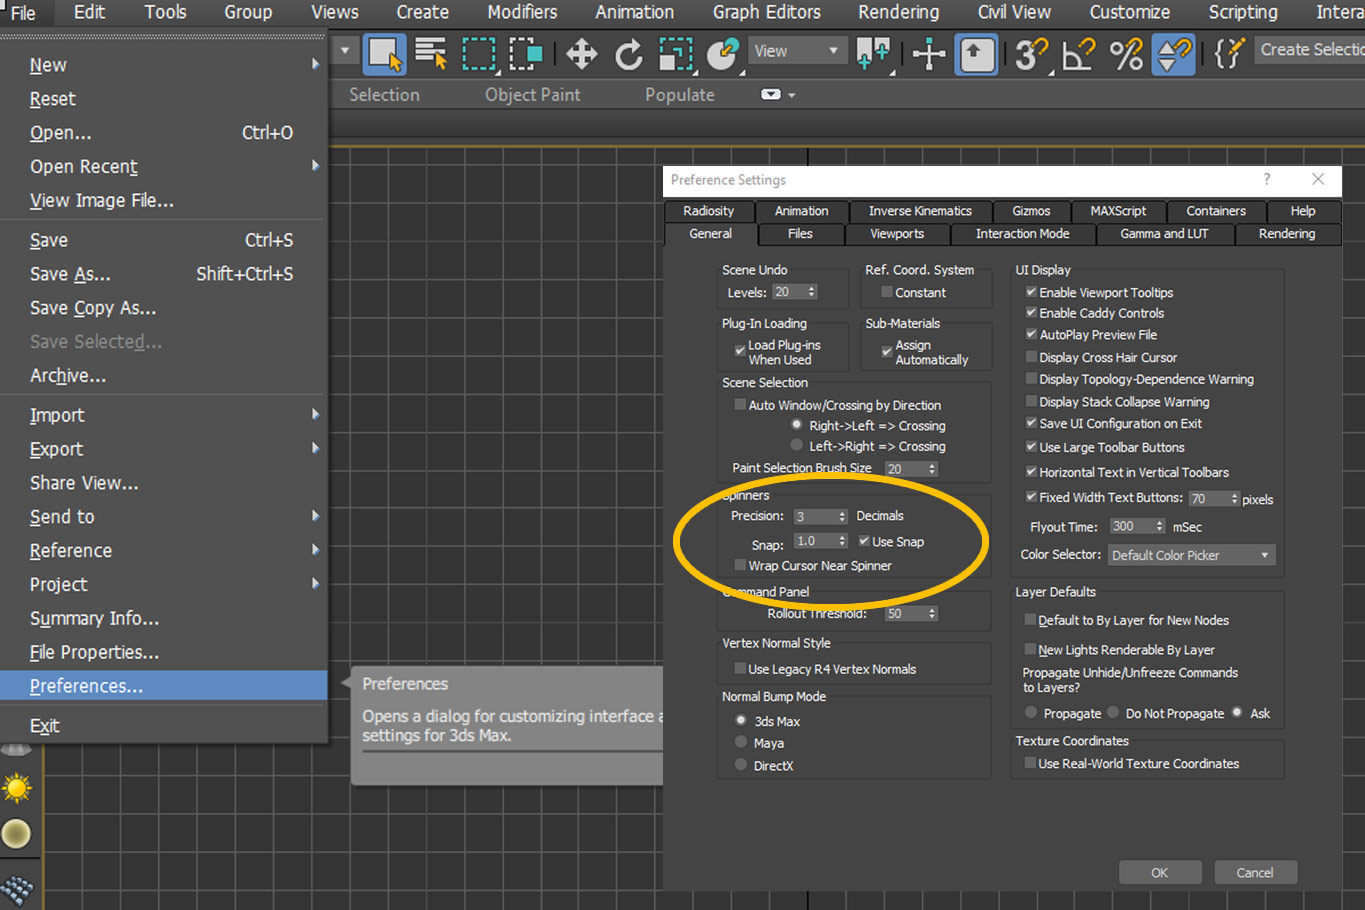
Spinner Spans settings are available through the File > Preferences > General >Spinners >Snaps menu
This step is optional, but quite useful. The default amount for this value is 1.0 units (whatever units you’ve set in your preferences) and isn’t that useful. Personally, I use .015 which is the truncated version of 1/64″. I use that setting because that’s the smallest measurement I usually work with. I suggest choosing a value that best suits your workflow.
Step 2: Enable Spinner Snapping
To enable Spinner Snapping after setting your custom value (or not setting that) simply click the icon on the ribbon menu bar. Its the one that looks like a magnet connected to two triangles (see image above). Alternatively, there is a tick box in the file > preferences > general > spinners > snap section where you can turn it one. There is no default hotkey setup for this feature in 3DS Max but it’s one of the first I add to my custom keymapping.
Review
Spinner Snaps are an often over-looked feature of 3DS Max but, when used properly, they can save thousands upon thousands of clicks. Seriously, I was setting mouse macros to burst-click before I discovered Spinner Snaps. I definitively couldn’t work with the Spinner Snap locked all the time—so I use set up a hotkey for it. I suggest anyone that spends a lot of time using 3DS Max give Spinner Snaps a whirl.


