

How To Use UV Mapping Channels in 3D Studio Max
UV Mapping channels can help map separate textures to a single object in such a way that allows different UV tiling configurations. This is useful in cases where blending masks are used, different resolution textures are used, or when repeating patterns need to be broken up for a more natural look. In this tutorial, you’ll see how to quickly leverage UV Mapping to add a grungy water splashing effect to the bottom of a wall object with concrete mapping without any texture editing.
Highlights
- UV Mapping Channels allow multiple UVW Modifiers on a single texture
- Different material texture slots can be assigned different UV Mapping channels
- Useful for combining multiple textures of different resolutions, aspect ratios, and orientations
Step 1: Add UVW Map Modifier to Model for Map Channel 1
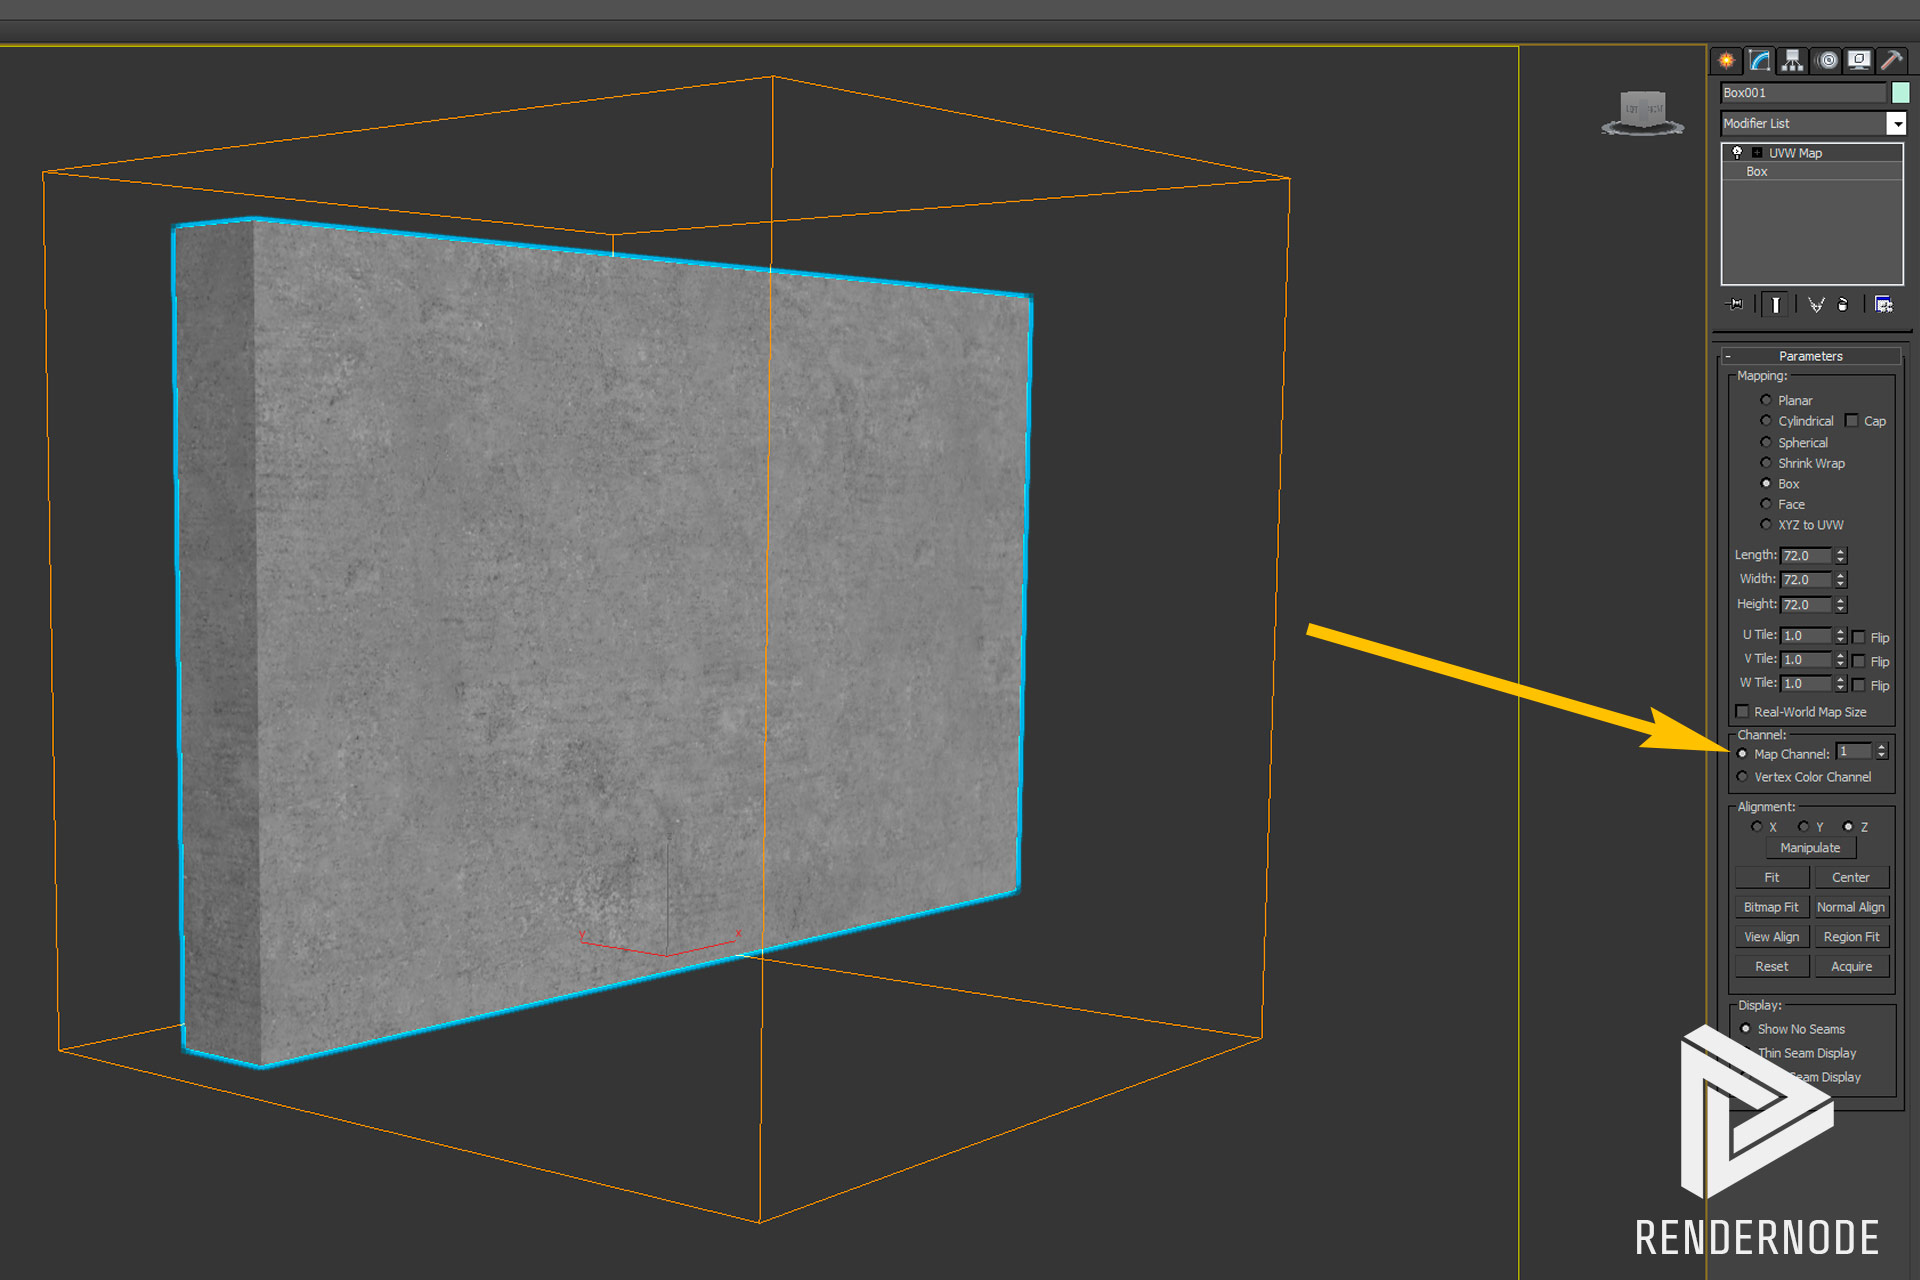
To get started, add a UVW Map modifier just as you normally would. This defaults to UV channel 1
The first step is to actually have an object that you can apply both textures and UV Mapping to. In this example, I’ve chosen a simple box object with a very basic VRay material applied to it that has a seamless concrete texture. To get things started, I’ve applied a UVW Map modifier to the box object, selected “Box” type mapping (type 4 for you MaxScripters out there) and scaled the default UVW Map Gizmo to produce the desired look. As shown in the image above, the UVW Map modifier defaults to a mapping channel of 1.
Step 2: Add Additional UVW Map Modifier for Map Channel 2
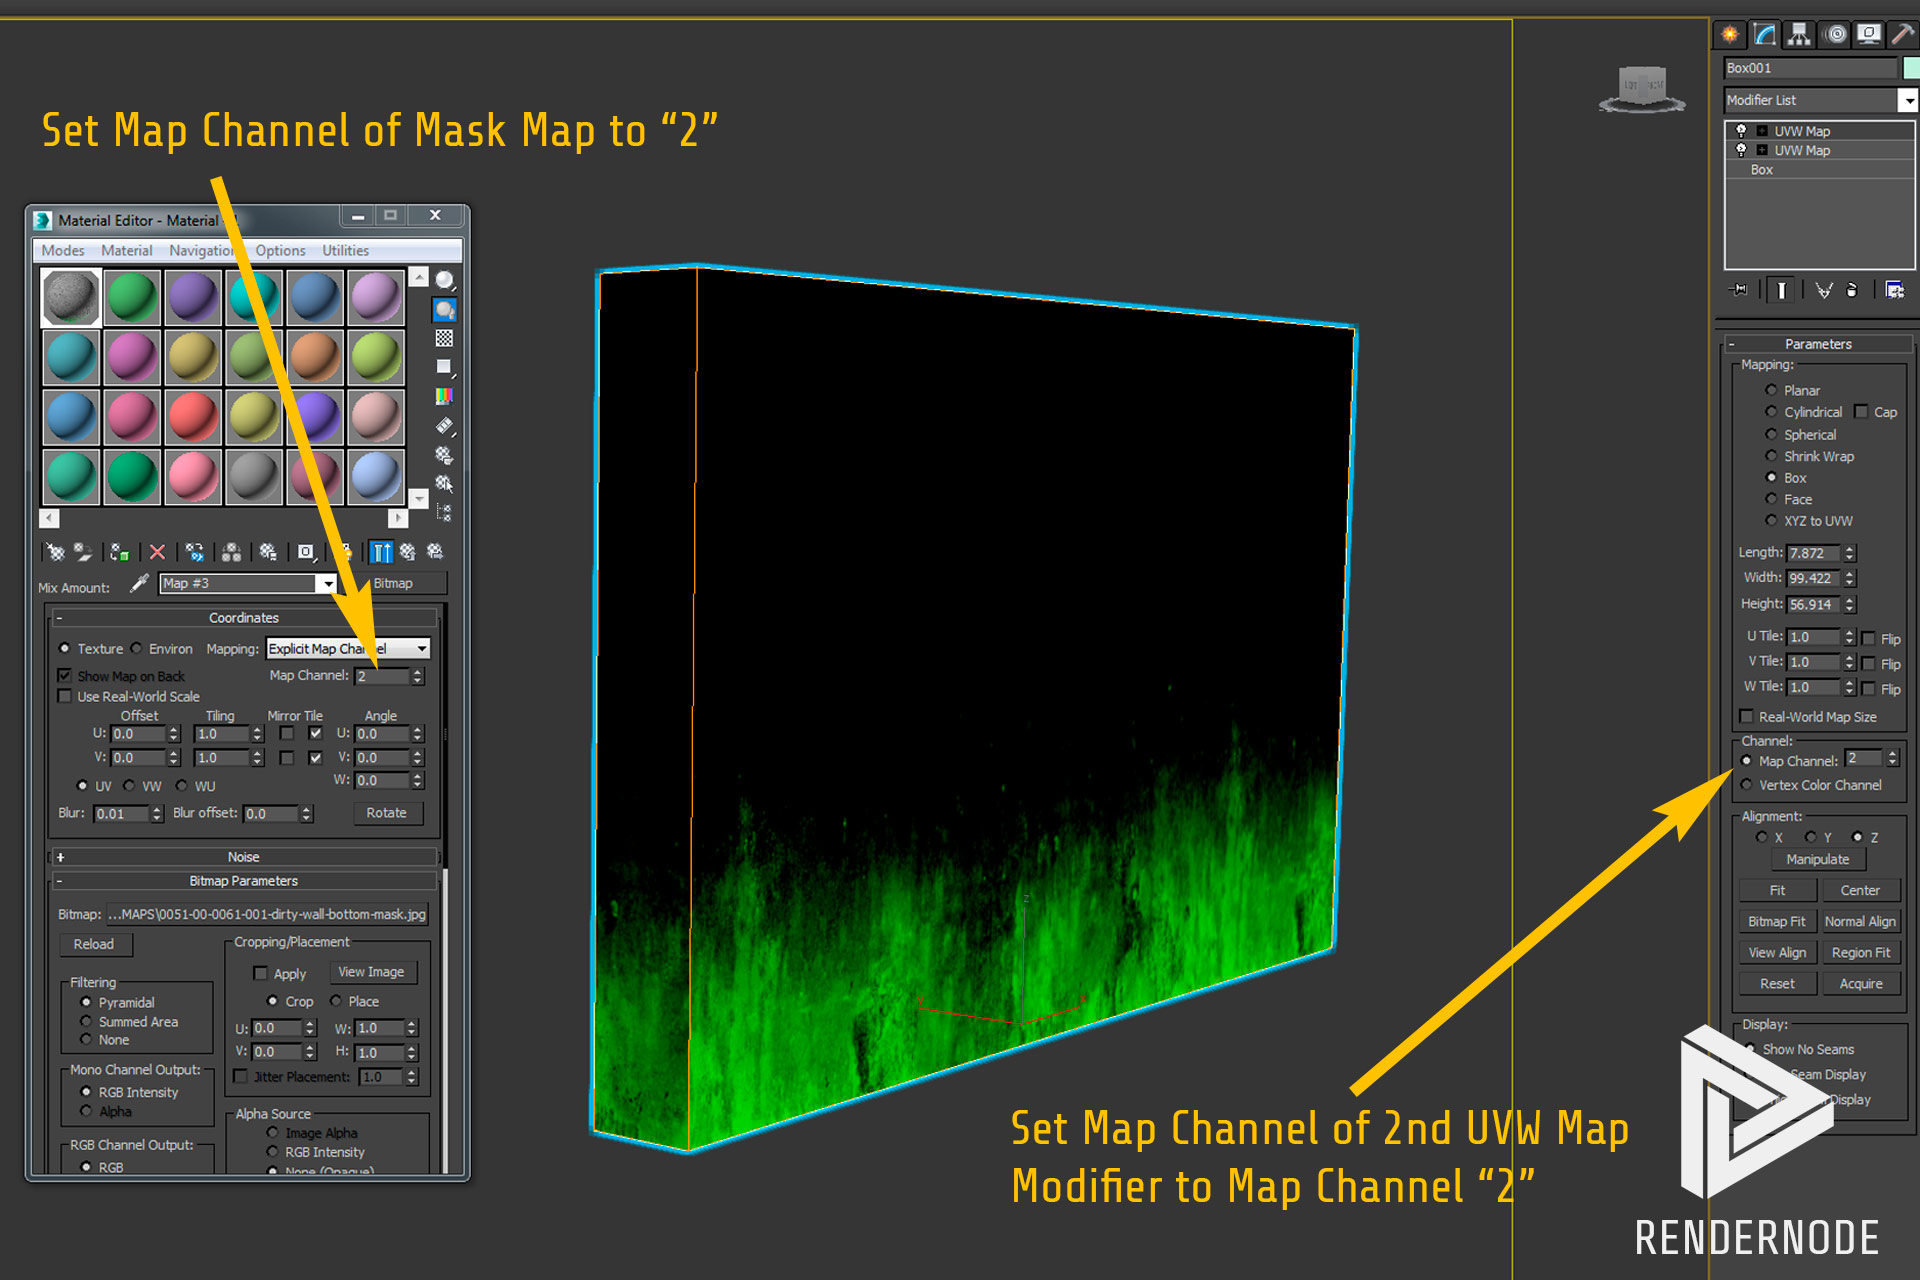
The second UVW Map modifier, when set to a non-Channel 1 setting, allows for multiple UV mapping solutions within the same texture.
The second step, after you have a basic mix of the concrete wall texture and a color to be used for the water splashing (green in this case), is to add another UVW Map modifier. Set the Map Channel parameter of the texture mask and the Map Channel parameter of the 2nd UVW Map modifier to the same value (has to be different than initial UVW Map modifier map channel of 1.) With this configuration, you can now transform the UVW Map Gizmo of the second UVW Map modifier to adjust only the mapping that controls the texture mask used for the water splashing effect. In other words, you can scale down the splash texture’s height via simple UVW Gizmo scaling without affecting the UVW Mapping scale of the concrete texture.
Other Considerations
UV Mapping channels are incredibly powerful and can be applied in very complex ways. One tremendous advantage they have is the ability to help reduce the number of texture maps needed for a scene by allowing on-the-fly compositing. An example, let’s say a scene has a concrete walkway bordered by a roadway. In this scene, a rainstorm has just passed leaving both surfaces covered in puddles and free-standing water.
Without UVW Mapping, additional maps would have to be created for non-rain and rain-filled versions of this scene to provide puddle reflections—one extra for the roadway’s specular channel and one extra for the concrete walkway’s specular channel. With UVW Mapping Channels, one can easily conform the same map to each surface and blend it in accordingly within the texture. More on that at a later time!


