
Using Photoshop’s Camera Raw to Edit 32 Bit HDR Images
High Dynamic Range (HDR) images are a godsend for rendering workflows and have saved my ass more than once. They allow for exposure correction in such a way that doesn’t lose the details of an image and can even reveal more details hidden in the shadows. Plugins like ArionFX are great for bringing these images into a post but Photoshop’s built-in Camera Raw filter works well too.
What is Camera Raw?
Camera Raw is the default intermediary program Photoshop launches when opening .raw files shot with digital cameras. This tool is used to make initial corrections to exposure, shadows, contrast, saturation, and many other attributes of images. Adobe’s official Camera Raw tutorial does well to explain how this tool works. It’s mostly used for photography-based workflows but also proves to be a valuable tool in 3D rendering workflows as well. That is, provided you can get it to work!
Configuring Camera Raw for 32 Bit Images
Photoshop’s support for editing 32-bit images has come a long way, but still isn’t what I’d call robust. Camera Raw isn’t a tool that’s commonly used for HDR image editing—at least not by default—so you have to change some settings to get it to work. Normally, the Camera Raw tool can be launched by going to Filter > Camera Raw Filter or by pressing Shift + Ctrl + A on your keyboard. This option is greyed out when a 32-bit image is opened.
This is a known issue that’s been reported since Camera Raw 9.10 and Photoshop CC 2017. I can confirm that it doesn’t work by default in Photoshop 2015 either. I’m not sure about versions farther back than that. Fortunately, there is a sensible workaround to exposure the Camera Raw tool to 32-bit images.
The only hiccup is that you aren’t able to launch Camera Raw directly and must first merge the 32-bit image down to a 16-bit or 8-bit image. The Camera Raw dialog will pop up during the conversion process after you follow these steps:
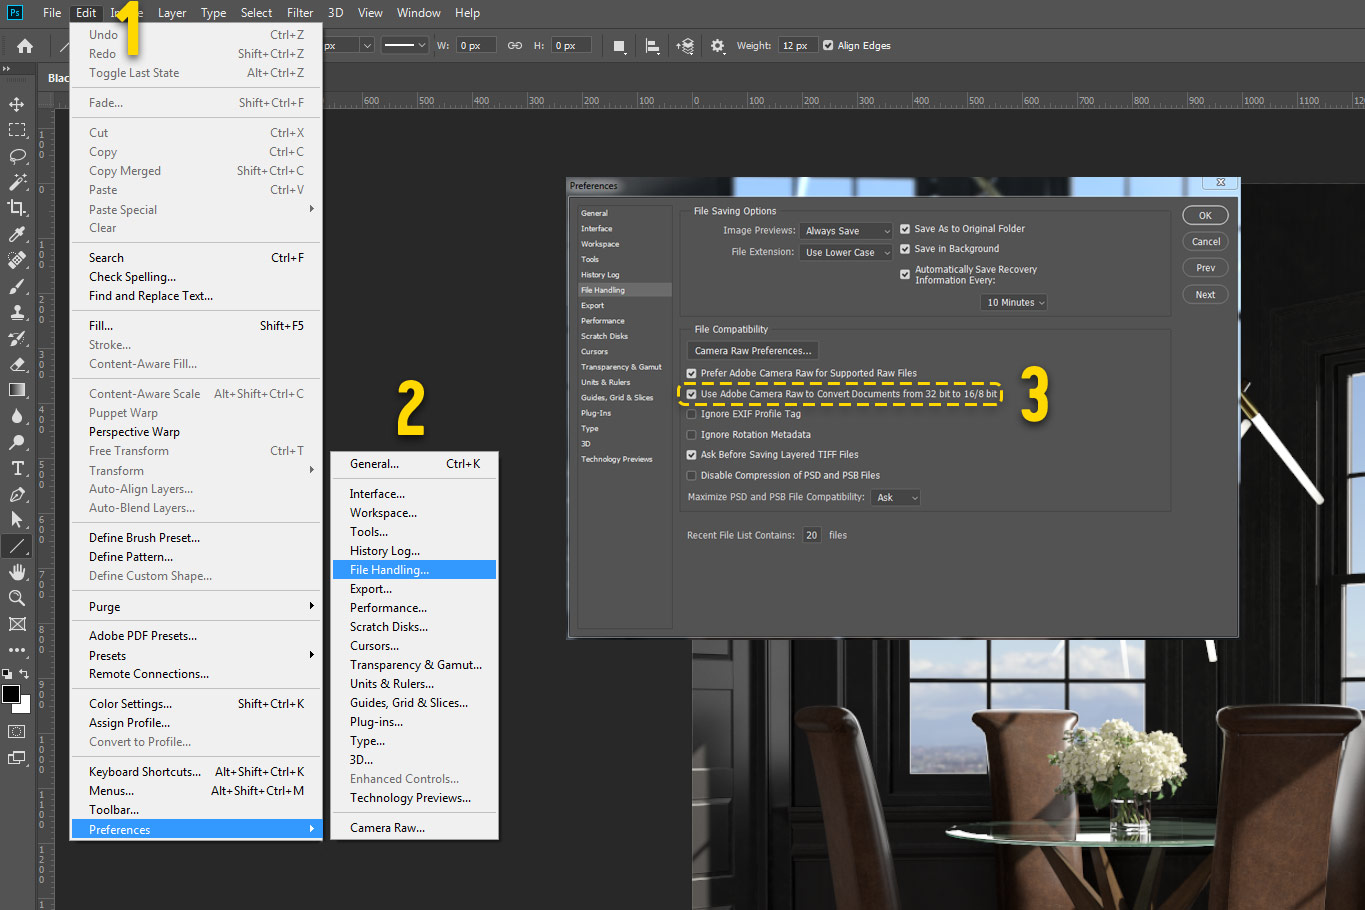
- Edit > Preferences > File Handling
- File Compatability > Use Adobe Camera Raw to Convert Documents from 32 bit to 18/8 bit.
- Click Ok
After this option has been enabled you can now launch the Camera Raw tool when merging 32-bit images to 16 bit or 8-bit sizes.
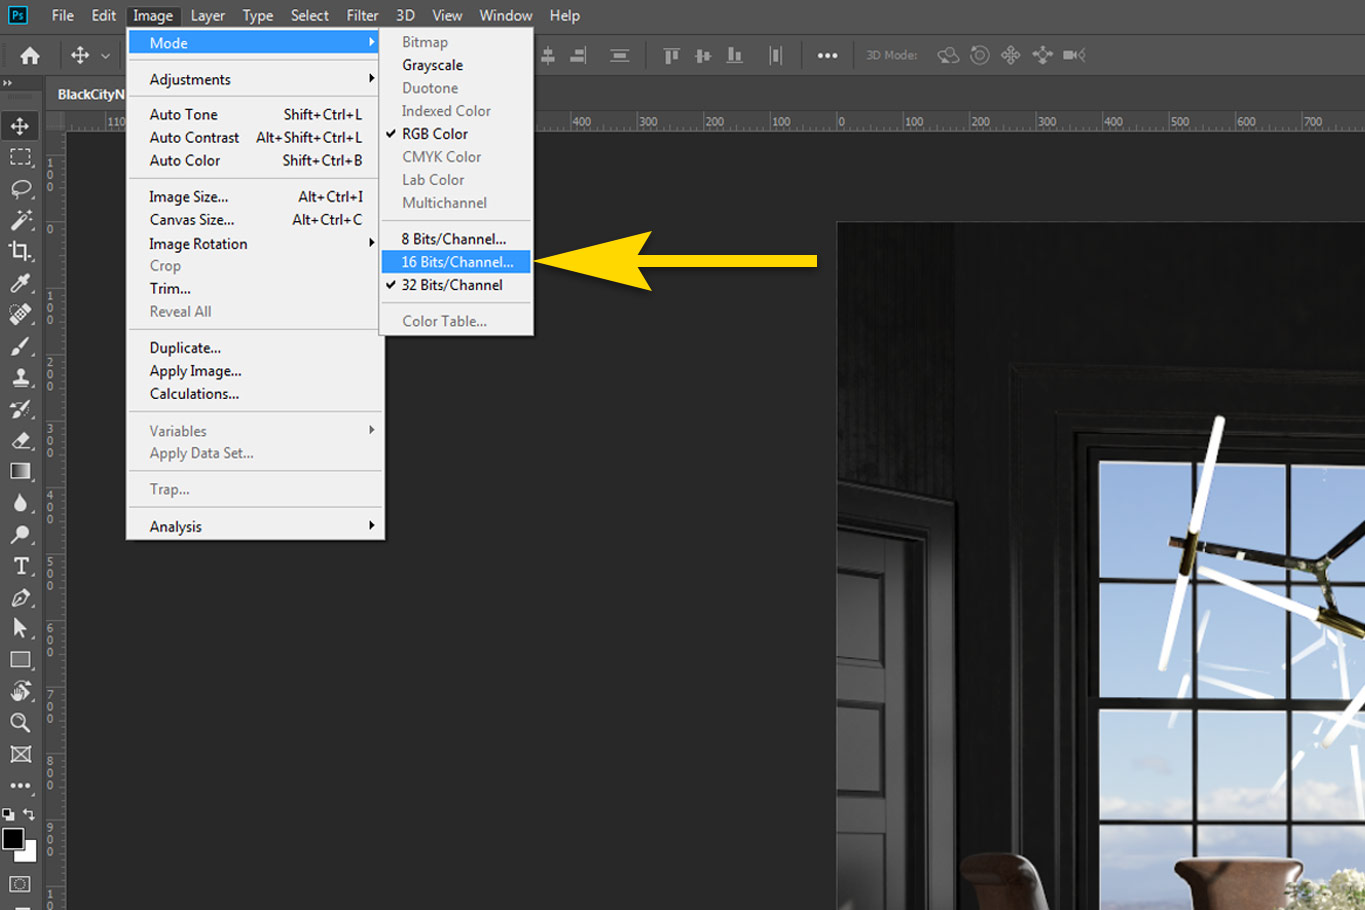
After enabling the “Use Adobe Camera Raw” option, Camera Raw will appear when using the image > Mode > 16/8 bit command
Photoshop only allows the use of a limited number of tools when working with 32-Bit images. Many of the layer adjustment filters and selection tools aren’t available. I’m not going to dive into why 32-Bit images aren’t able to use these, but Adobe has a pretty decent run-down of high-dynamic range imaging workflows—as they relate to Photoshop.
Fair warning: their guide is strongly catered towards photography and merging multiple exposures to first create an HDR image before editing. Here’s a picture of what the default Photoshop HDR tonemapping looks like (before enabling Camera Raw support.)
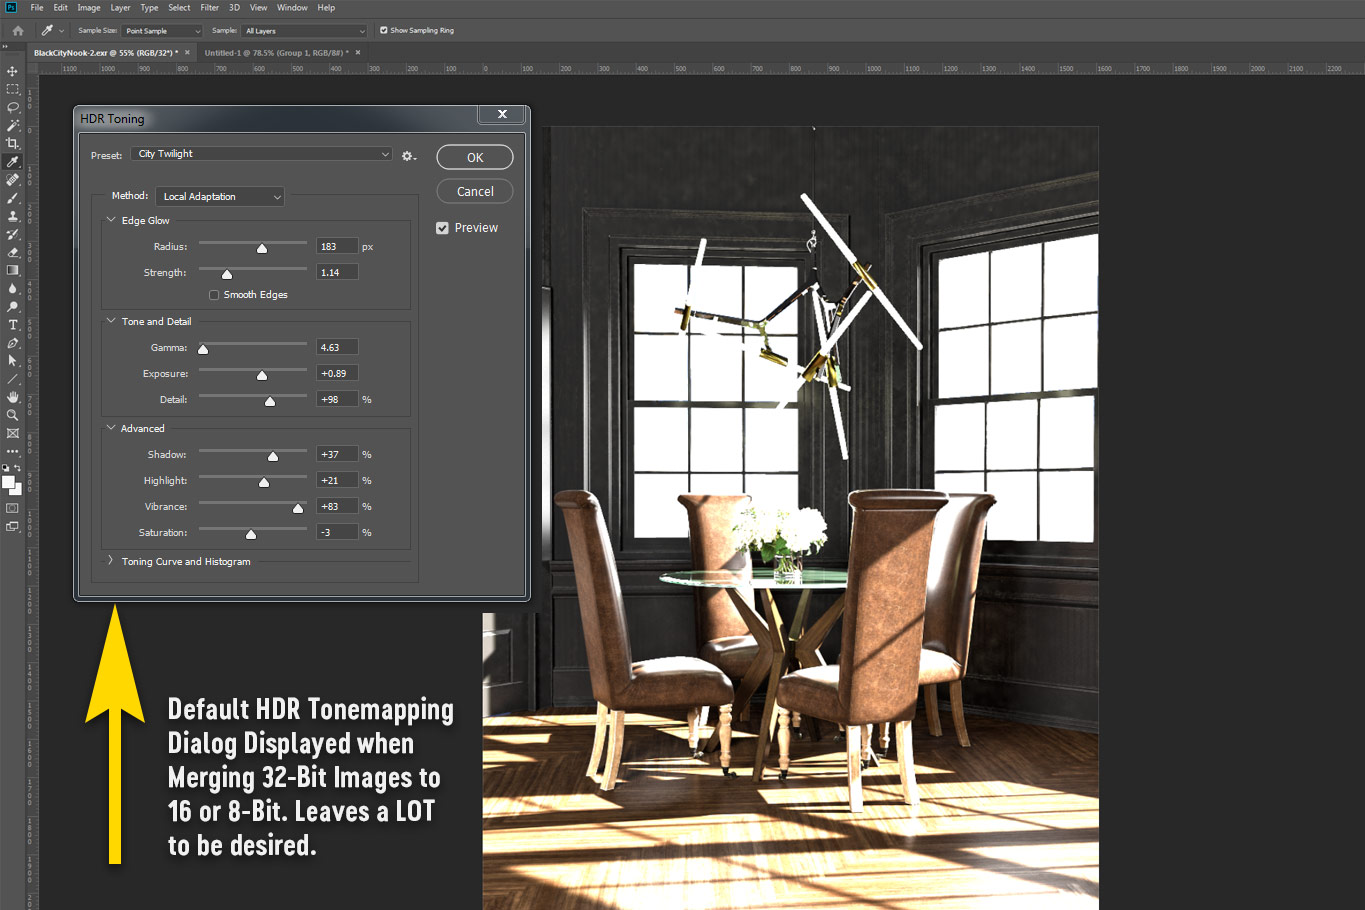
Photoshop’s default tonemapping tool has fewer options than Camera Raw and the presets are pretty unattractive
And here’s an image that shows what the Camera Raw dialog looks like after enabling 32-bit image support in the Edit > Preferences > File Handling menu:
The Camera Raw dialog that will now appear when using the Image > Mode > 16/8 Bit Command
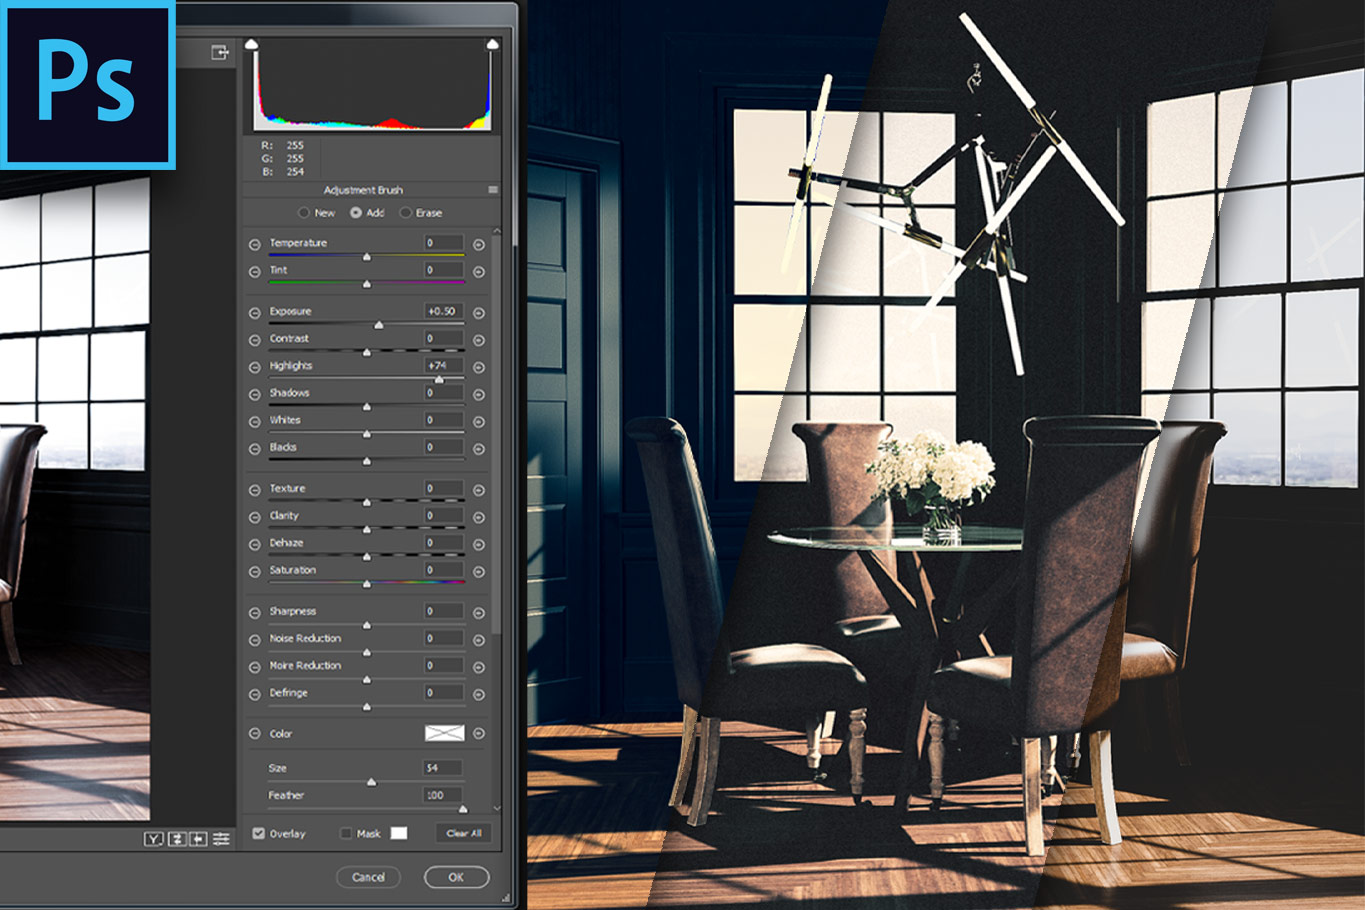
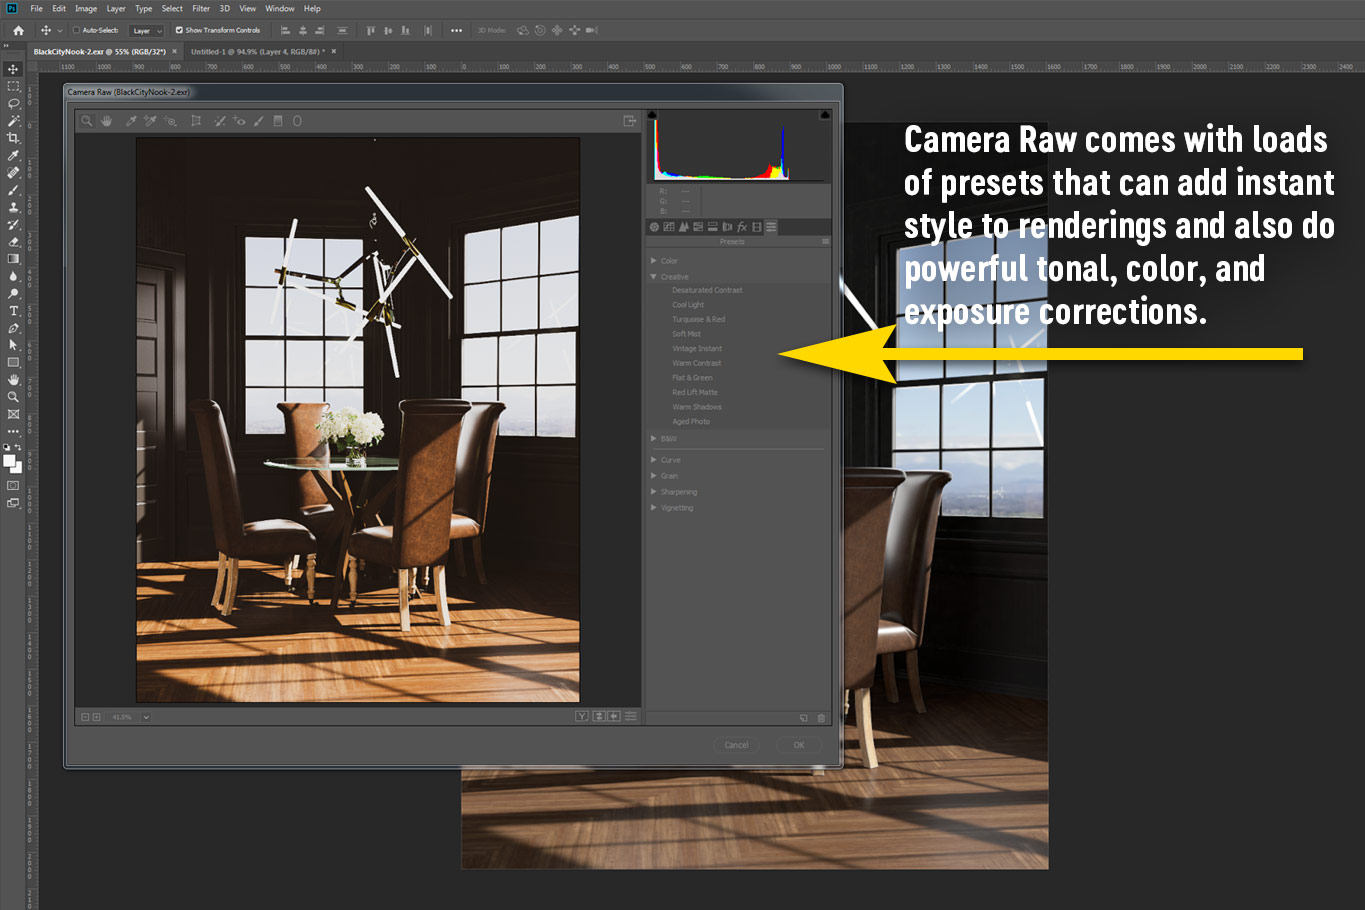
Examples of Camera Raw Filters
Camera Raw has a lot of features and can really dig into an image. What’s more: it also has a lot of solid presets that you can apply to an image with a single click. These presets range from cross-processing, black and white effects, and can even be applied cumulatively. Check it out:
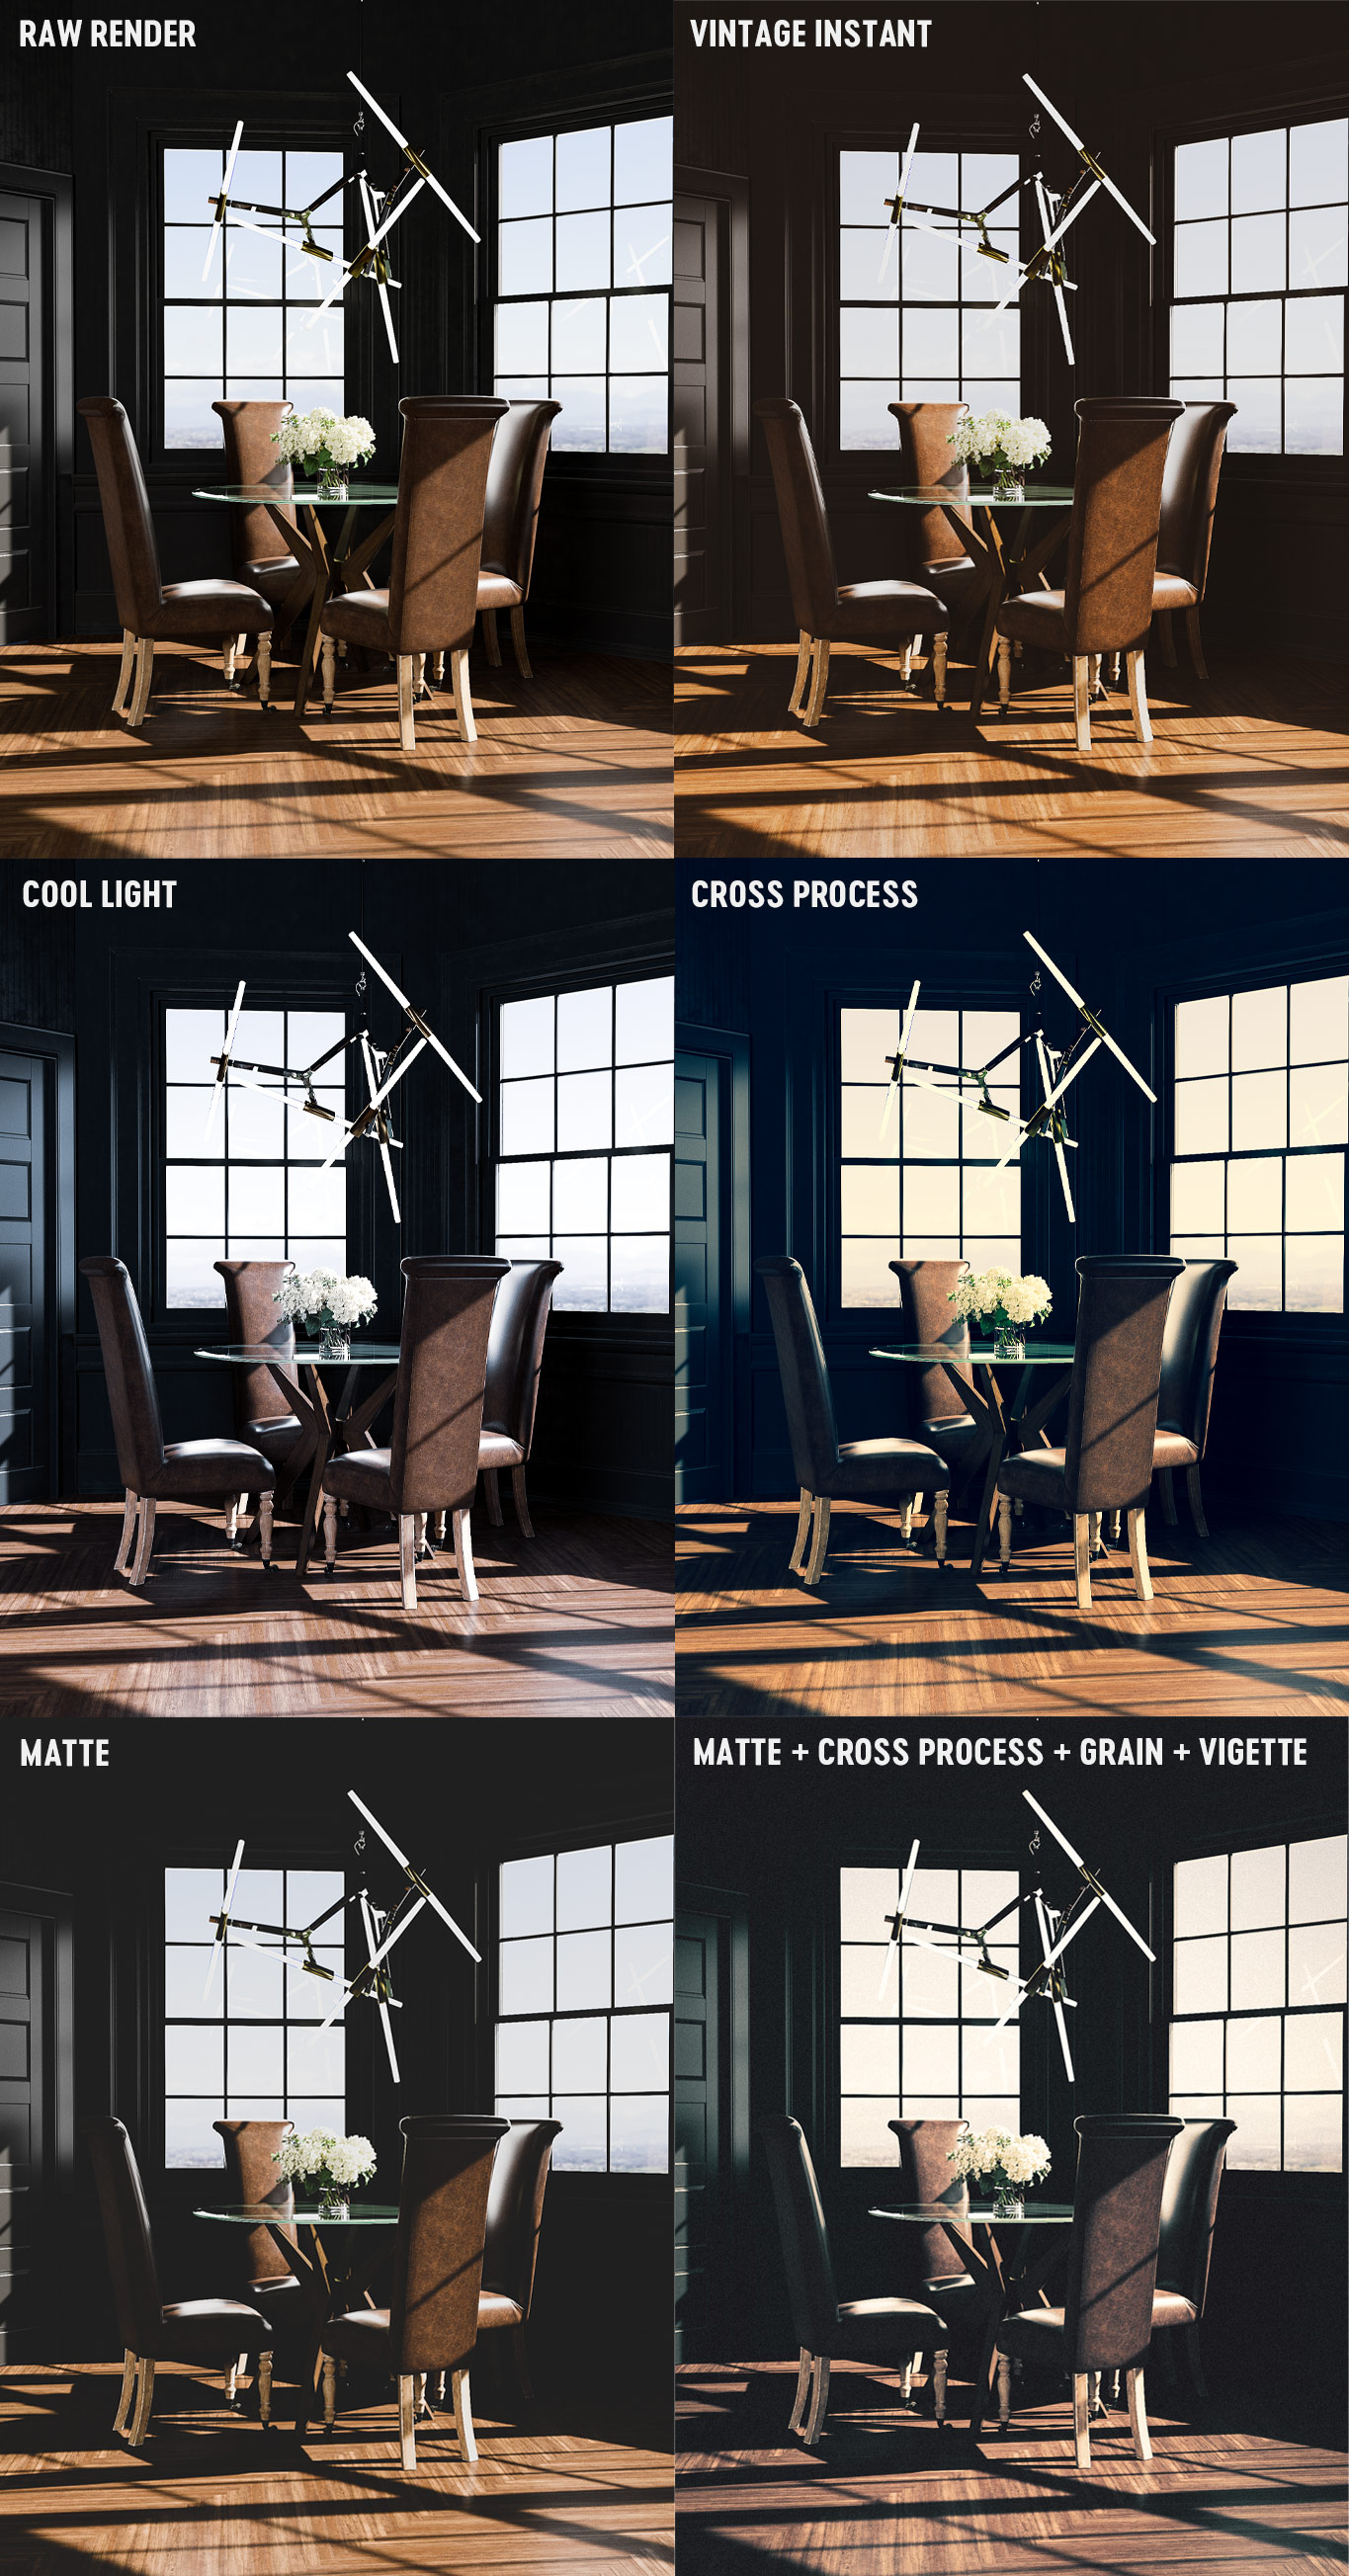
Camera Raw has loads of presets that can be applied individually or cumulatively in just a few clicks.
Final Thoughts
Is Camera Raw the best HDR processing tool? I give it a strong vote for the “always know it’s there as long as Photoshop is” category, but it still lacks some of the more sensational effects such as fringing, blooming, and burning out hightlights. It’s important to remember that Camera Raw is designed to help real-world image look less raw. Most 3D rendering postprocessing workflows that I’ve seen try to make images look more raw.
