
Creating Seamless Tileable Textures in Photoshop
Seamless textures make life so much easier. They allow for on-the-fly UV Mapping solutions, can be used in a wider range of projects, and eliminate a lot of post-processing work. Creating seamless textures in Photoshop is really easy—but every image calls for its own series of edits and corrections. This tutorial is about laying out a framework that can apply to any texture.
Benefits of Tileable/Seamless Textures
Textures that tile make life easy. You don’t have to stress as much about UV Mapping, you can re-use images more, and post-processing is less of a headache. The problem is that most images aren’t seamless, especially ones that you might have taken with your camera—the real world doesn’t tile very often. Seamless textures are also an attribute that will help marketplace assets sell better and receive better reviews. Personally, I avoid textures that don’t tile as much as possible—I know their negative implications on my workflow.
Creating a Seamless Texture
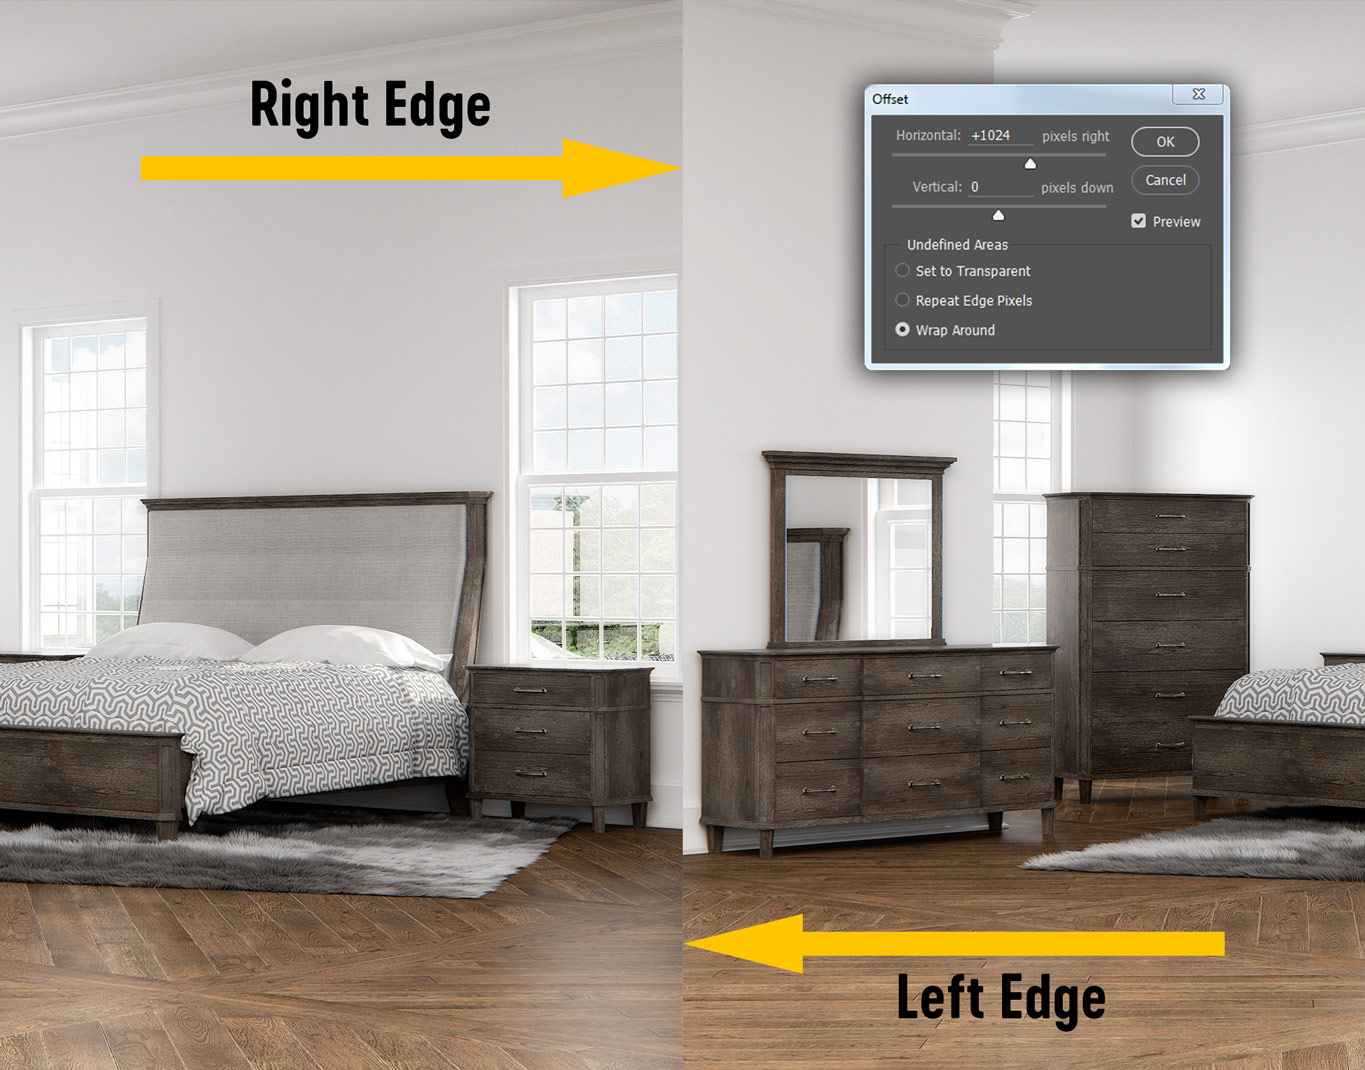
Photoshop can do just about anything one can imagine to a 2D image, provided you’re willing to put in the effort. The main tool used to create tileable textures in Photoshop is the Offset filter. This tool “wraps” the edges of an image file around the edges of the canvas such that the left edge will align to the right edge and the top edge will align to the bottom edge.
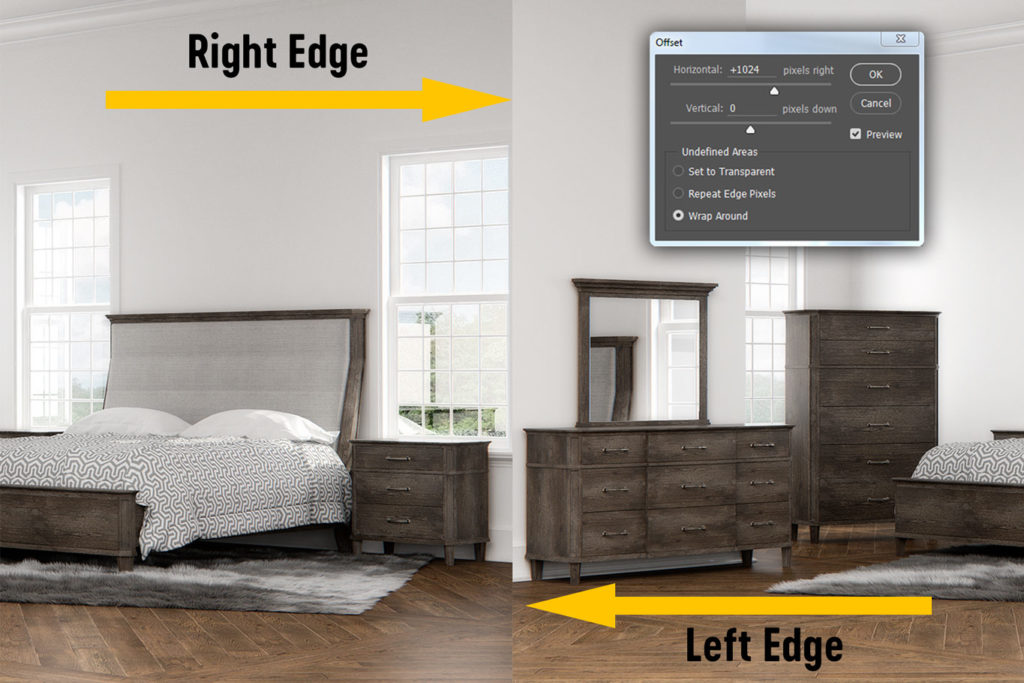
The offset tool wrapped this image around the edges of the canvas such that the right and left sides now touch.
In the above image, which was 2048px in width, applying an Offset filter with a Horizontal value of 1024px (half of the overall width) creates a tile effect. In this case, a “seam line” is created where the two edges of the image now meet. Taking action to remove seam lines from images is how you create Seamless textures in Photoshop. It’d probably be more accurate to call them Seam-Line-Less textures but—you know—it doesn’t roll off the tongue as nicely! Below are is a series of steps that can be applied to most images to remove seamlines and create textures that tile beautifully!
Step One: Pre-Process Editing
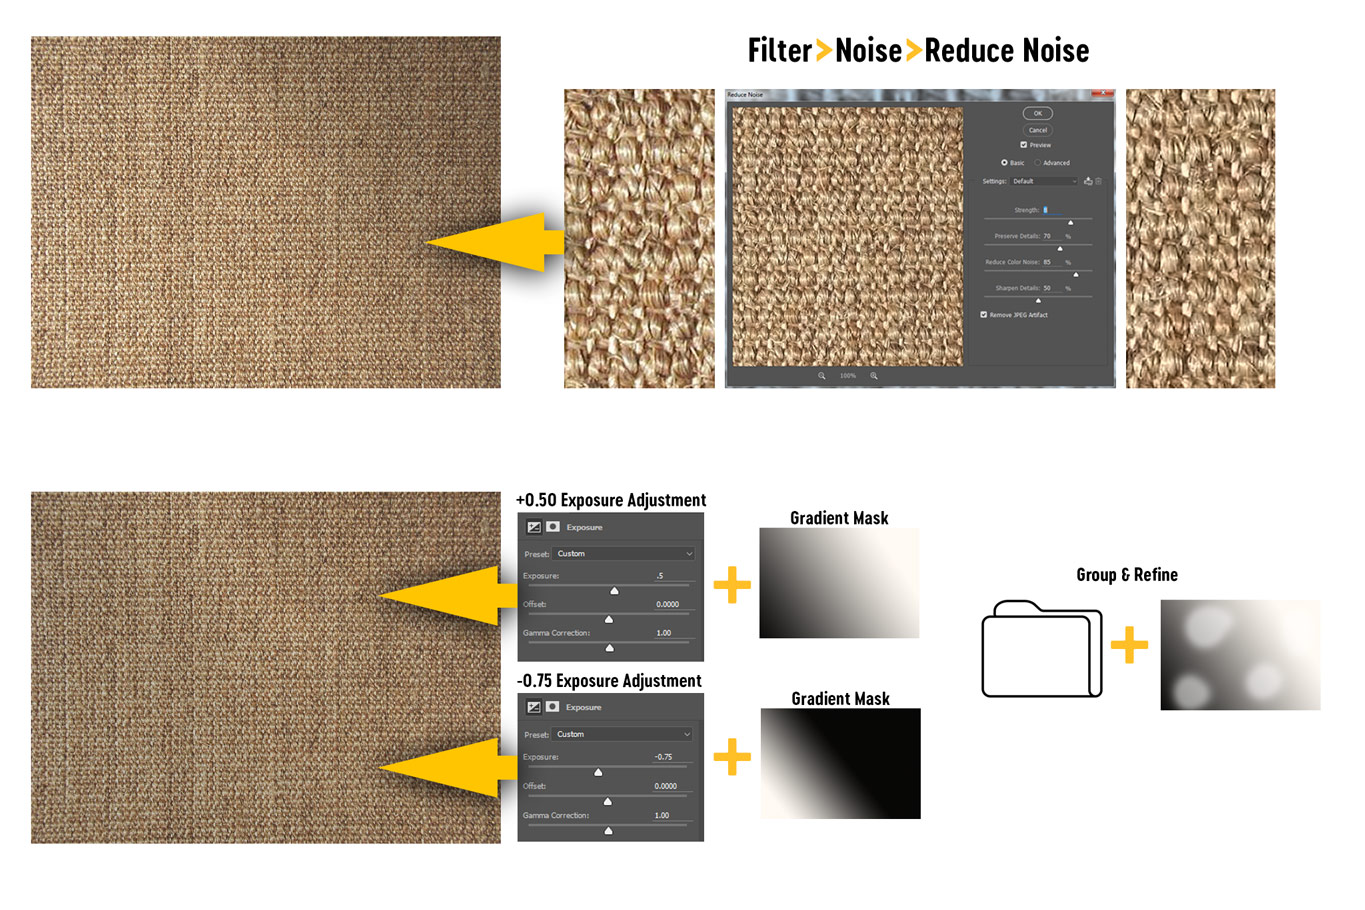
Pre-Process your image to remove noise and balance exposure using layer adjustments, masking, and Photoshop filters
I like to create high-resolution textures and often enlarge textures from their original sizes to achieve this goal. Some types of edits are easier and more efficient to apply before any enlargements take place. Removing noise is one such edit that will be more accurate and take much less CPU power when applied to the original image.
Another edit I make, when removing seamlines is my end goal, is to normalize an images exposure balance. That is; trying to make underexposed and overexposed areas less pronounced. This can be achieved using an Exposure adjustment in most cases. This step is different for every image and not always necessary. Sometimes, after trying to normalize exposure for a while, I realize that creating a seamless version of a particular texture isn’t possible—or at least not practical.
Step Two: Balance Image Structure
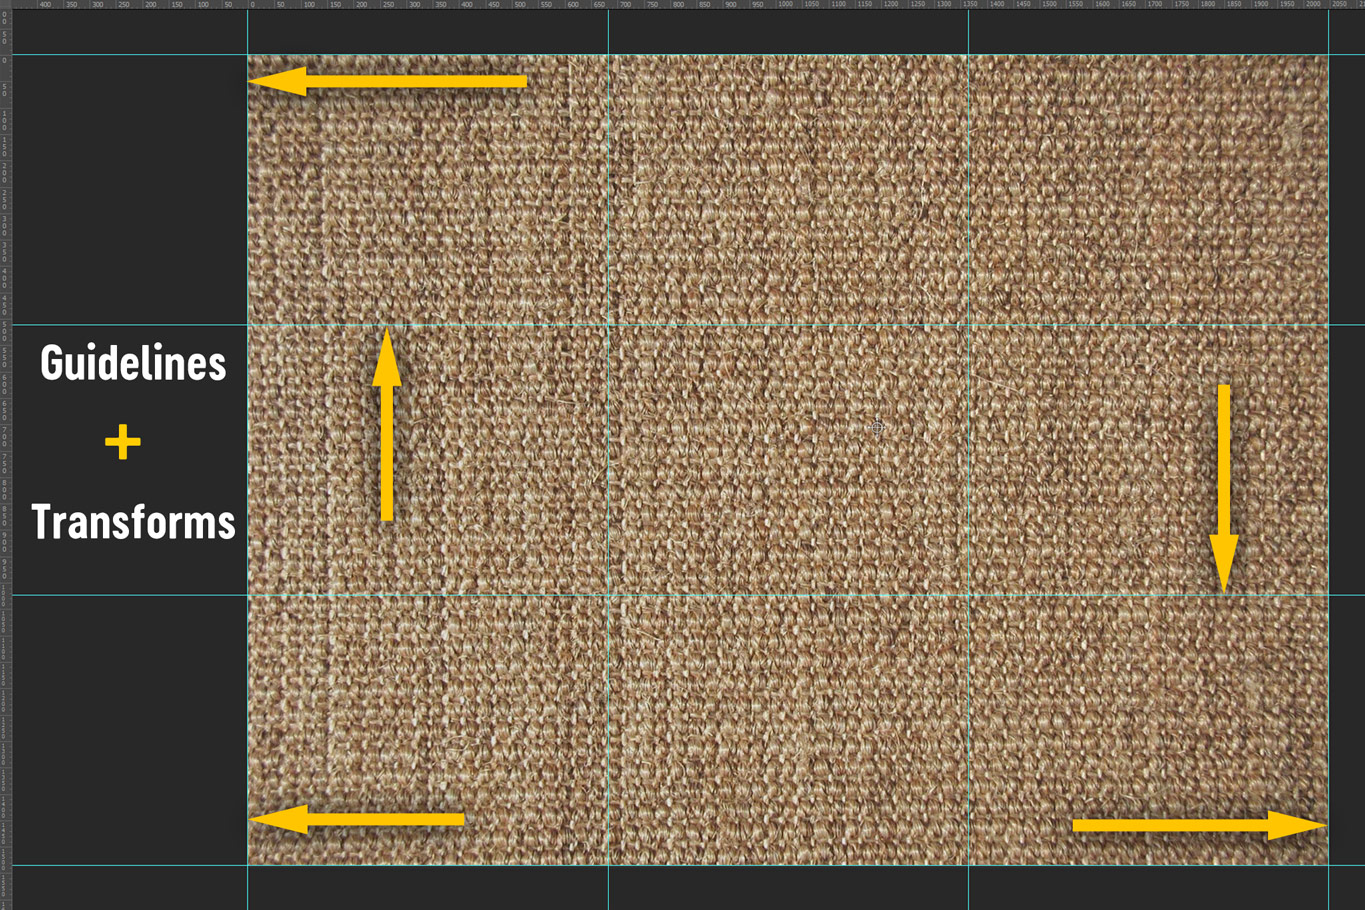
Using the Skew + Warp tool is very helpful to straighten out any odd patterning in images.
Many textures have structural patterning that doesn’t tile well. In this Jute rug texture, there are horizontal and vertical lines where the material is woven together. These lines give the appearance of “rows” within the texture. These rows need to be straightened out so that when the image tiles, the edges of the lines meet on either side of the image. Not all images require this step but one should always consider it.
Step Three: Enlarge + Crop
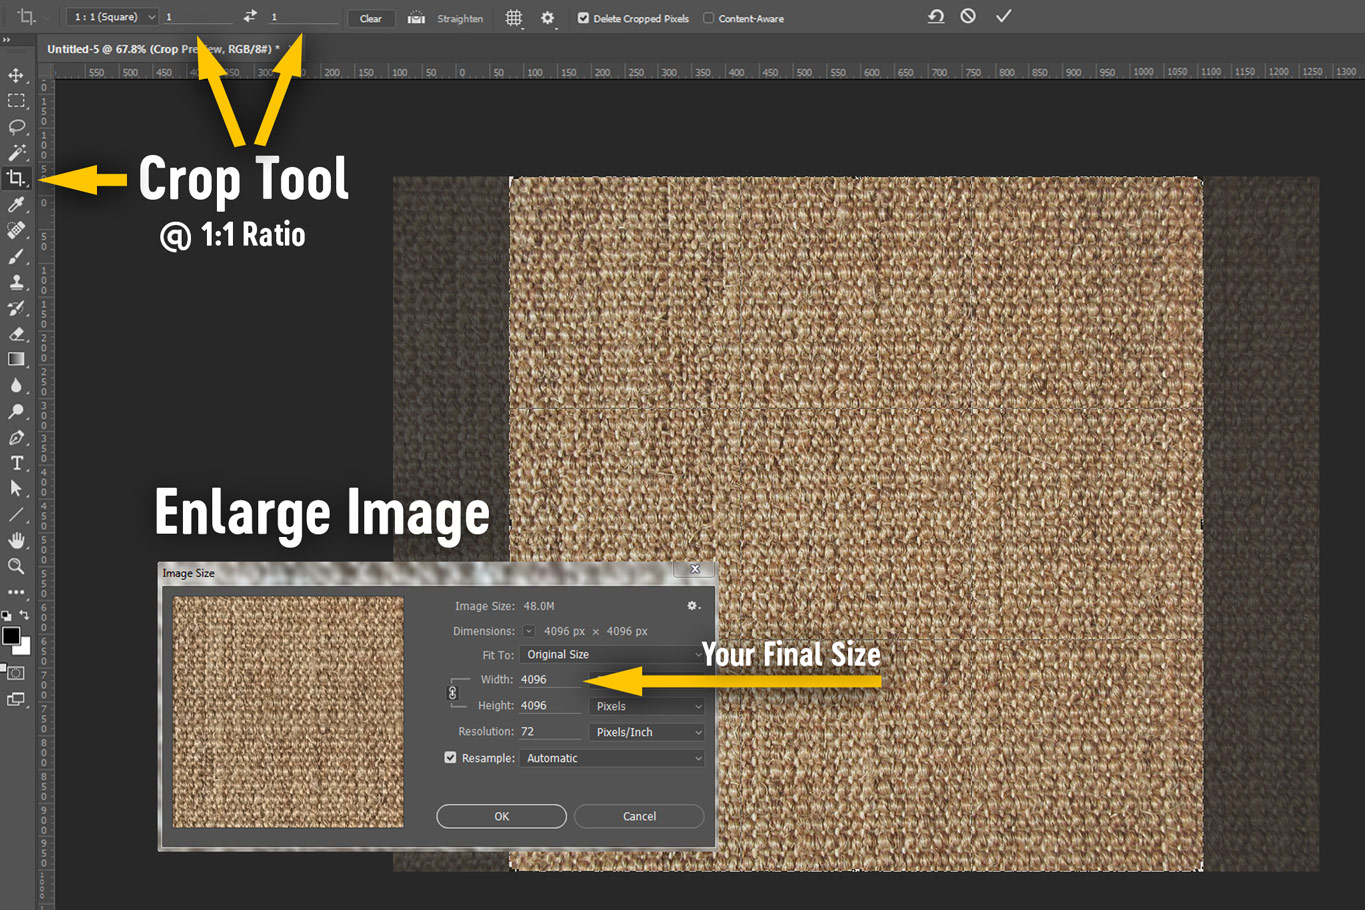
Define the texture aspect ratio and resolution using the Crop and Image Size tools
To this point, I’ve shown edits done to the image in its original dimensions. Filters like Remove Noise are much more efficient in lower-res images and applying image transformations are a bit easier as well. Lower images require less memory to edit—it’s as simple as that. At this point, I want to take things as close to my final desired output size and aspect ratio as possible. The ideal aspect ratio for an image that is intended to be tileable is 1:1. There is no ideal resolution, but I prefer to work in 4K (4096 x 4096) or higher when creating textures I intend to use over and over again. I use the Crop Tool with a 1:1 aspect ratio set and find a nice crop. Next, I use Ctrl + Alt + I to resize the image to 4096 x 4096 pixels.
Step Four: Sharpen Image
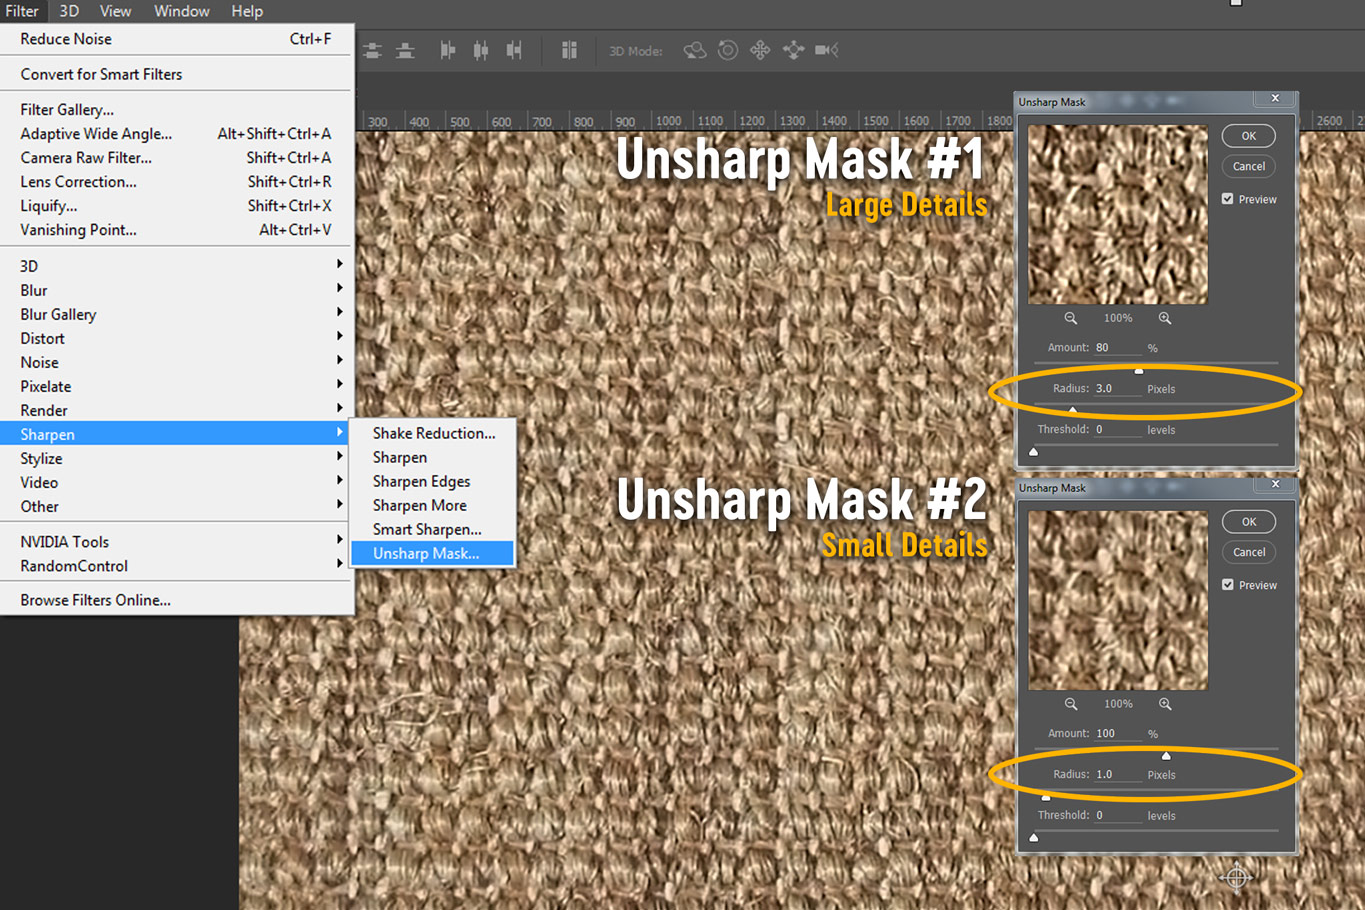
Sharpen large and small details by applying multiple Unsharp Filters with different radius values
Images that are considerably enlarged usually need to be sharpened as well. How you choose to sharpen your image doesn’t matter—only that it ends up with an appearance suitable for your purposes. I like using Photoshop’s Unsharp Mask filter and find it effective in most cases. I have used third-party sharpening tools in the past but find that using built-in filters is more convenient. I also don’t like being dependent on something that might not always be available if I’m using Photoshop on a different workstation. I apply the Unsharp Mask filter two times—one for large details and one for small details—and use the following settings for 4K images:
Large Details: 2.8 – 3.2 px Radius
Small Details: 0.8 – 1.2 px radius
Step 5: Tile + Remove Seam Lines
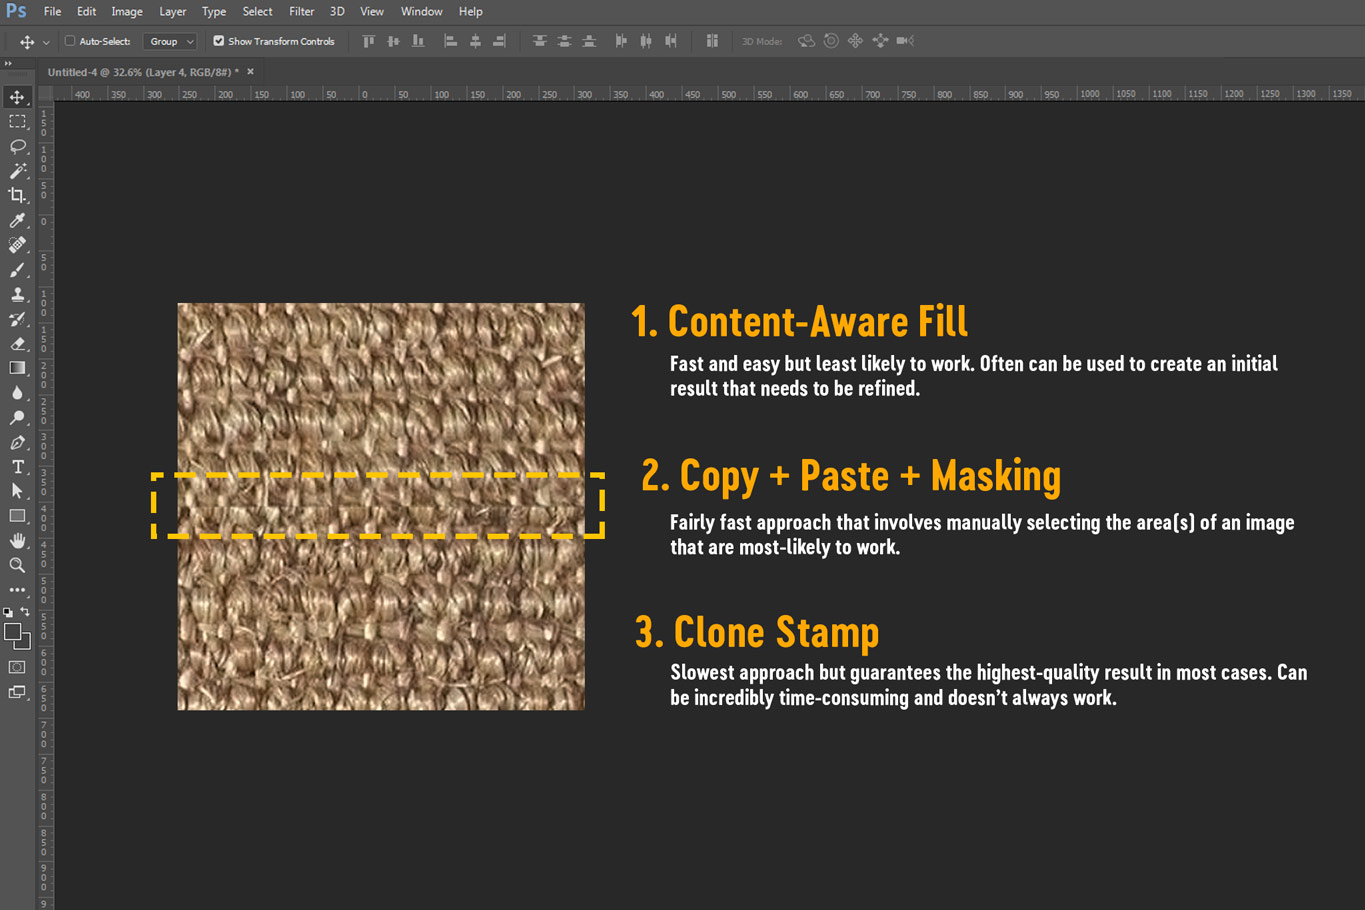
Several different approaches can be used for removing seam lines after using the Offset Filter
Everything I’ve done to this point is to make removing seam lines as easy as possible. Imbalance exposures, wandering structural lines, and even areas of varying sharpness can cause tiling issues. Tiling a texture in Photoshop is really easy—just use the Offset Filter with the Wrap Edges option selected. This will “wrap” the edges of an image around the edges of the canvas based on the offset values you specify. I remove seamlines using a two-step process as follows:
Remove Horizontal Seam Lines: Filters > Other > Offset > Horizontal > 50% of Image Width
Remove Vertical Seam Lines: Filters > Other > Offset > Vercial> 50% of Image Height
For each of these offsets, I edit the image to remove the seamlines. What edits are needed varies greatly depending on the image. Sometimes, I make it this far just to realize that it will take far too long to remove the seamlines and start looking for another image. When I think this step is going to be an issue, I will do it before any other edits to get an idea of what I might be facing. The surest way to remove seamlines is by using the Clone Stamp Tool. It’s a very manual process that, depending on the image, can take a really long time. I often use other approaches first, such as copy other parts of the image, stretching the image, or using the Fill Tool with the Content-Aware option selected.
Final Thoughts
Creating seamless textures in Photoshop is easy but requires some special attention to ensure a quality final result. The steps I’ve outlined here won’t guarantee your final image is perfect but are applicable for most use-cases. I often play around with cropping + offsetting before I do anything else to get an idea of how well an image will tile. Not all images will tile well-enough to justify spending the time to edit them. Don’t be afraid to abandon one image and look for a better one. I’ve spent a lot of time in Photoshop creating seamless textures over the years and can say, with confidence, that the more textures one edits the easier it gets to spot those that will tile well before the first pixel is changed. Knowing which images won’t tile well saves a lot of time!
